Obsidian 好用,但是同步太烂了。第三方插件 obsidian-livesync 提供了 CouchDB 同步的功能,这肯定搞一下
1 、 Obsidian
一款 Markdown 编辑器,插件很多
本人推荐试试,这个不好用还有隔壁 Notion
默认支持格式不多 [ 链接 ]
支持通用的 markdown 格式 [ 链接 ]
2 、 obsidian-livesync
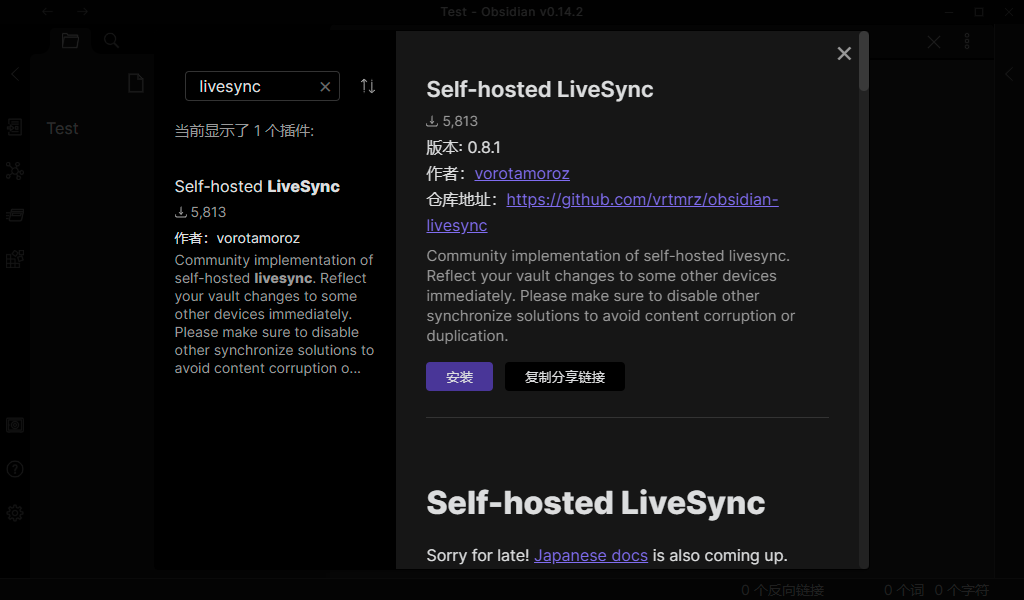
Obsidian-LiveSync 是一款第三方同步插件 [ 链接 ]
支持 IBM Cloudant 和 Apache CouchDB ,由于没钱所以我们当然是会选择 CouchDB
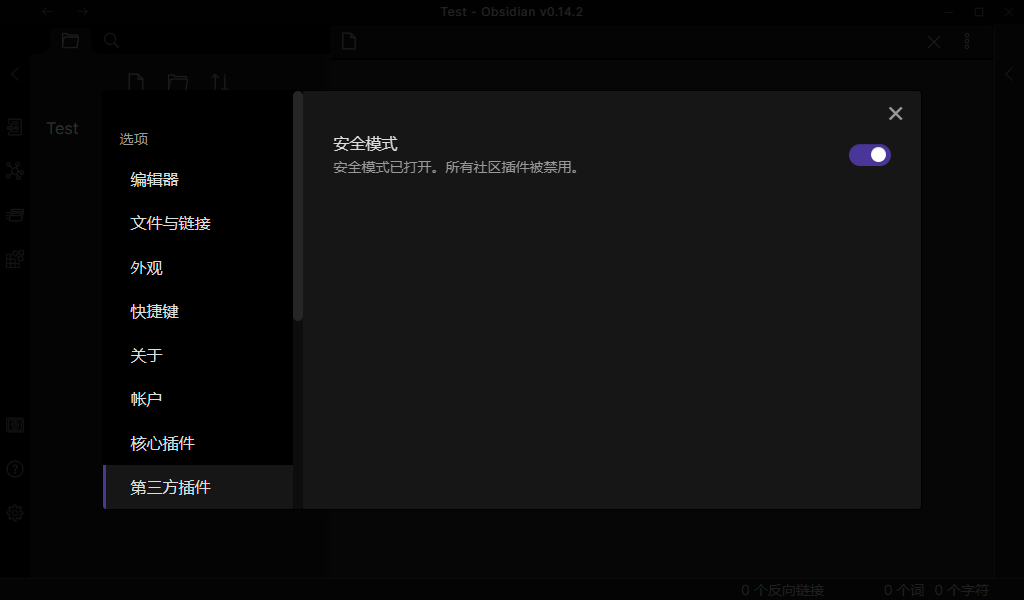
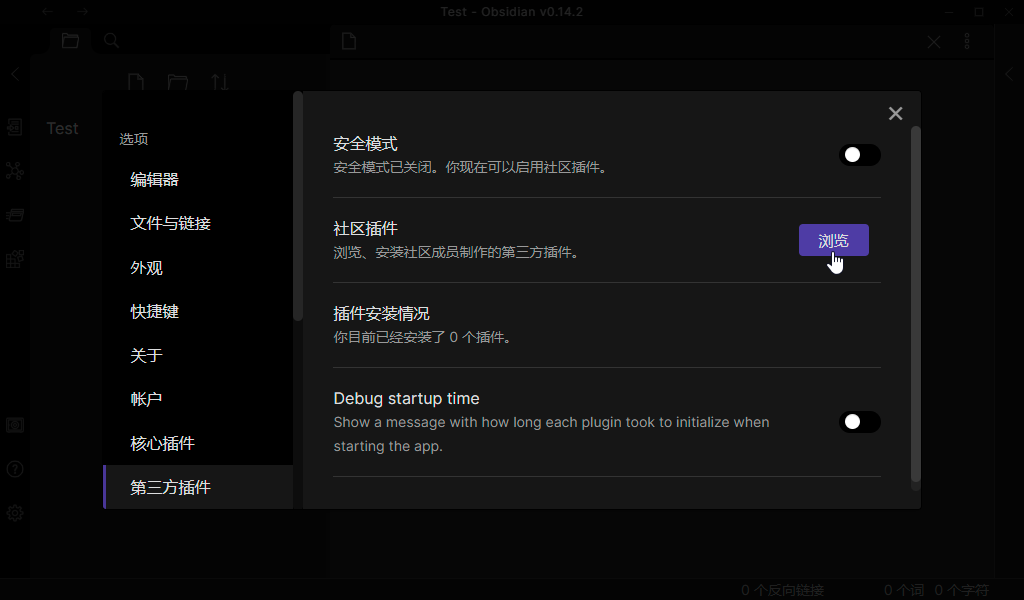
首先我们需要在 库 中安装该插件,注意每个库都要这样安装
安装好后我们记得要启用这个插件。
3 、 CouchDB
首先当然是安装 CouchDB [ 链接 ]
sudo apt update
sudo apt install -y curl apt-transport-https gnupg
curl https://couchdb.apache.org/repo/keys.asc | gpg --dearmor | sudo tee /usr/share/keyrings/couchdb-archive-keyring.gpg >/dev/null 2>&1
source /etc/os-release
echo "deb [signed-by=/usr/share/keyrings/couchdb-archive-keyring.gpg] https://apache.jfrog.io/artifactory/couchdb-deb/ ${VERSION_CODENAME} main" \
    | sudo tee /etc/apt/sources.list.d/couchdb.list >/dev/null
sudo apt update
sudo apt install -y couchdb
安装时需要输入安装模式,默认单机选 standard 即可,用户 admin 的密码自行输入
安装完毕后,相关文件路径如下
配置 /opt/couchdb/etc/local.d/*.ini
数据 /var/lib/couchdb/shards/*
由于我们创建的只是给 Obsidian 用,所以我们只需要新增一个配置文件并填入相关配置即可
配置参数说明 [ 链接 ]
Obsidian 用到的配置 [ 链接 ]
vim /opt/couchdb/etc/local.d/obsidian.ini
[chttpd]
port = 5984
bind_address = 192.168.1.10
require_valid_user = true

[httpd]
WWW-Authenticate = Basic realm="Obsidian"
enable_cors = true

[chttpd_auth]
require_valid_user = true
authentication_redirect = /_utils/session.html

[cors]
origins = app://obsidian.md,capacitor://localhost,http://localhost
credentials = true
headers = accept, authorization, content-type, origin, referer
methods = GET, PUT, POST, HEAD, DELETE
max_age = 3600
CouchDB 的 vm.args 文件应类似如下内容(apt-get upgrade 后未选择 standard 可能存在差异)
# Do not rely on tricks with /etc/hosts or libresolv to handle anything
# other than the above 3 approaches correctly. They will not work reliably.
#
# Multiple CouchDBs running on the same machine can use couchdb1@, couchdb2@,
# etc.
-name couchdb@127.0.0.1

# All nodes must share the same magic cookie for distributed Erlang to work.
# Uncomment the following line and append a securely generated random value.
# -setcookie

# Which interfaces should the node listen on?
-kernel inet_dist_use_interface {127,0,0,1}

# Tell kernel and SASL not to log anything
-kernel error_logger silent
-sasl sasl_error_logger false

# Use kernel poll functionality if supported by emulator
+K true

# Start a pool of asynchronous IO threads
+A 16

# Comment this line out to enable the interactive Erlang shell on startup
+Bd -noinput

# Force use of the smp scheduler, fixes #1296
-smp enable

# Set maximum SSL session lifetime to reap terminated replication readers
-ssl session_lifetime 300
配置好后端并重启后,我们在前端配置上数据库即可(需登录)
http://192.168.1.10:5984/_utils/
Setup - Configure a Single Node 配置单用户模式
Create - Create Database 创建数据库
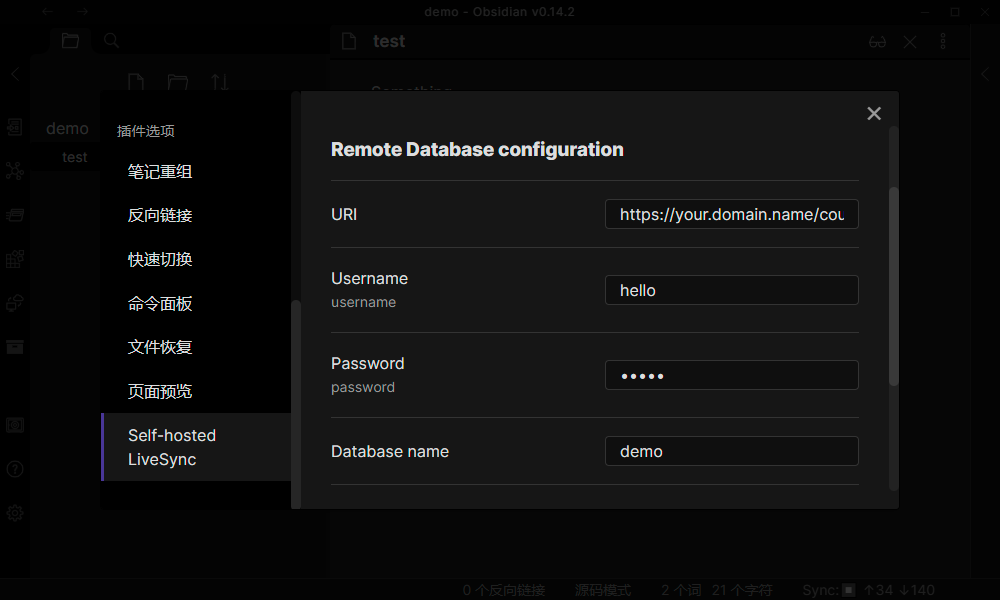
创建完数据库,就可以在 Obsidian 配置好参数并使用了
URL  http://192.168.1.10:5480
Username  admin
Password  yourpass
Database name  demo

也可以创建子用户,仅管理指定数据库,这样分开权限管控。
3.2 、 Docker 版 CouchDB
当然你也可以学官方说明安装一个 Docker 版本的,这并无不可
vim local.ini
[couchdb]
single_node=true

[chttpd]
require_valid_user = true

[chttpd_auth]
require_valid_user = true
authentication_redirect = /_utils/session.html

[httpd]
WWW-Authenticate = Basic realm="couchdb"
enable_cors = true

[cors]
origins = app://obsidian.md,capacitor://localhost,http://localhost
credentials = true
headers = accept, authorization, content-type, origin, referer
methods = GET, PUT, POST, HEAD, DELETE
max_age = 3600
docker run --rm -it -e COUCHDB_USER=admin -e COUCHDB_PASSWORD=password -v .local.ini:/opt/couchdb/etc/local.ini -p 5984:5984 couchdb
注意如果你忘记创建 local.ini 并直接运行 docker 命令,docker 会因为 -v 参数的挂载而自动生成一个 local.ini 的文件夹,如果想配置还需要删掉才能使用。
4 、 CouchDB 与 Nginx SSL
既然都有 http 了,都 2022 年了,为什么不来一个 https 呢
当然,域名和 Nginx 服务相关的配置就不提了,直接上关键配置 [ 链接 ]
原始数据库访问 URL:http://localhost:5984/obsidian/
对外数据库访问 URL:https://your.domain.name/couchdb/obsidian/
原始访问 URL:http://localhost:5984/
对外访问 URL:https://your.domain.name/couchdb/
应用访问 URL:https://your.domain.name/couchdb
应用数据库 URL:https://your.domain.name/couchdb/obsidian/
server {
    listen   443 ssl http2;
    listen   [::]:443 ssl http2;
    server_name  your.domain.name;
    root         /usr/share/nginx/html;
    ssl_certificate PATH_TO_YOUR_PUBLIC_KEY.pem;
    ssl_certificate_key PATH_TO_YOUR_PRIVATE_KEY.key;
    ssl_ciphers 'ECDHE-ECDSA-AES128-GCM-SHA256:ECDHE-RSA-AES128-GCM-SHA256:ECDHE-ECDSA-AES256-GCM-SHA384:ECDHE-RSA-AES256-GCM-SHA384:ECDHE-ECDSA-CHACHA20-POLY1305:ECDHE-RSA-CHACHA20-POLY1305';
    ssl_protocols TLSv1.2 TLSv1.3;
    ssl_prefer_server_ciphers off;
    ssl_session_cache shared:SSL:10m;
    ssl_session_timeout  1d;
    access_log  /var/log/nginx/couchdb.log main buffer=64k flush=15s;
    error_log  /var/log/nginx/couchdb-error.log;

    location / {
    }

    location /couchdb {
        rewrite /couchdb/(.*) /$1 break;
        proxy_pass http://localhost:5984;
        proxy_redirect off;
        proxy_buffering off;
        proxy_set_header Host $host;
        proxy_set_header X-Forwarded-For $proxy_add_x_forwarded_for;
        proxy_set_header X-Forwarded-Ssl on;
    }

    location /_session {
        proxy_pass http://localhost:5984/_session;
        proxy_redirect off;
        proxy_buffering off;
        proxy_set_header Host $host;
        proxy_set_header X-Forwarded-For $proxy_add_x_forwarded_for;
        proxy_set_header X-Forwarded-Ssl on;
    }
主要内容有两部分
1 、后端转发传递给 /couchdb
2 、会话转发传递给 /_session
5 、特殊问题
配置是配置好了,但是不好用怎么办
首先就得看日志,正常运行时的日志如下所示
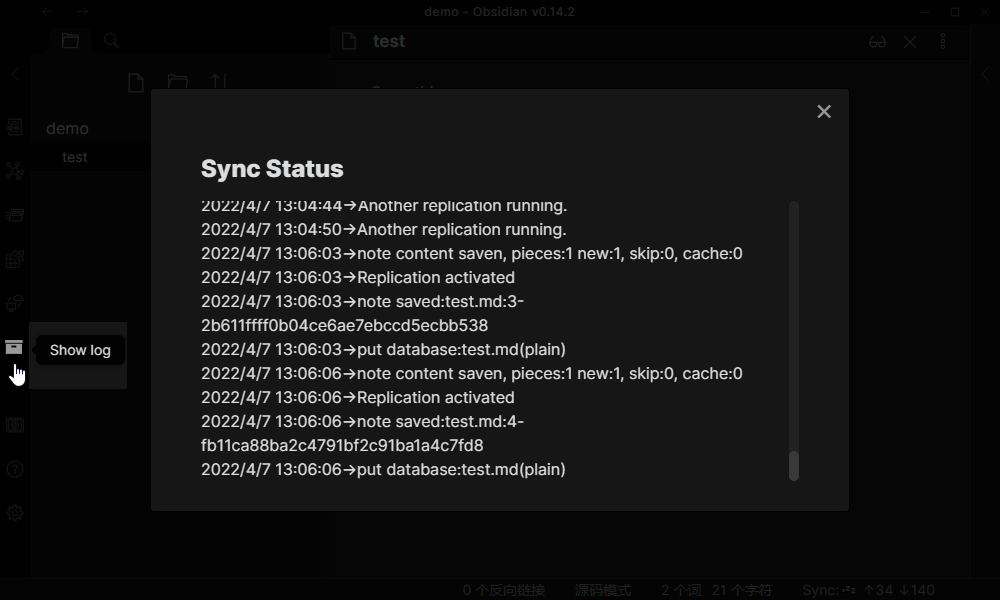
插件内的 Test Database Connection 是发送一个 HTTP 请求,只要有 200 OK 就算连接成功 Connected to test 。
Error:Request Error:404 could not connect to https://your.domain.name/couchdb : demo (Error:Request Error:404)
所以以日志为准。当日志出现 Replication closed 时基本上可以认为连接失败。
5.1 、 iCloud 同步 Obsidian
不要使用 icloud 同步 obisidian
@Nico_Ranshi
本人没试过,但是按照讨论说法,会导致数据冲突或者丢失。
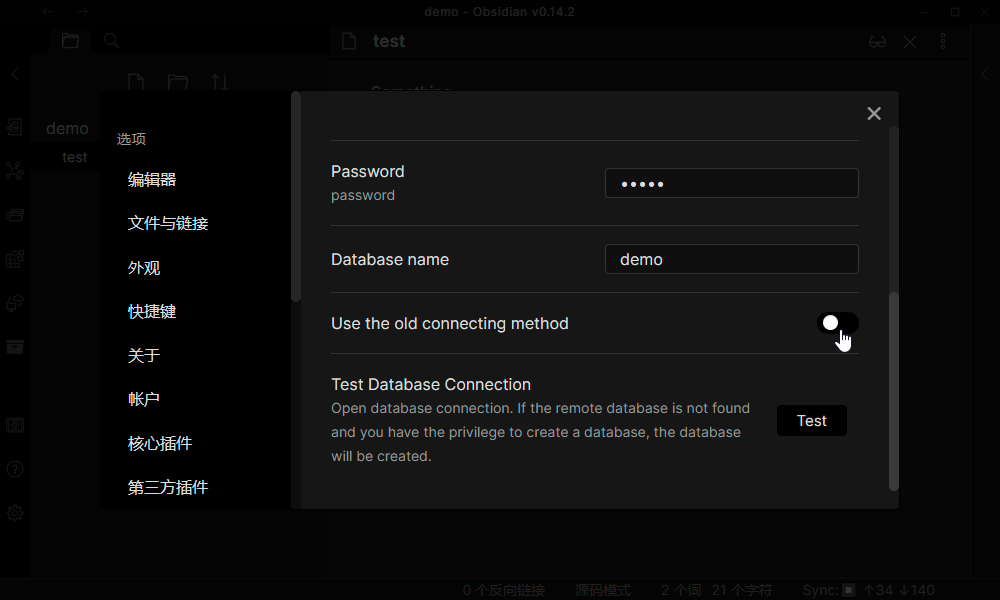
5.2 、 Use The Old Connecting method
出现这个问题的主要原因是发送请求没有结果导致的,而这个请求很特殊
https://your.domain.name/database/obsydian_livesync_version?
库名 database
如果这个请求 404 时,则需要开启该选项(Windows 10 Client)
如果这个请求 302 时,则不需要开启该选项(IPad OS 13 Client)
本质是 CouchDB 的 CORS 功能限制导致的。配置好 Origin Domains 则不会出现该问题
5.3 、以文本方式打开文件
Obsidian 是一款 markdown 编辑器,所以支持 md 文件。
但是常用的 文本 不止这一种后缀,而且文本也不需要 markdown 解析格式
所以需要一个插件 Plaintext 来打开 纯文本格式 文件
插件需要手动输入后缀名列表,对于常用的可以是如下后缀名
txt,cfg,conf,ini,log,json,yaml,css,js
